Note: In this blog post, I’m talking about Azure Functions, which are currently in preview. Settings, functionality, pricing, etc. may still change.
Introduction
I’m constantly trying to optimise my life by automating small tasks, so that I can either save some time and get things done without having to remember them. For example, I’m a big fan of both IFTTT and Instapaper, and use these two in combination to have new blog articles (e.g. from dev.office.com/blogs) posted into my Instapaper account automatically, so I can’t read those easily and quickly when I’m travelling to and from work. I do not need to check on a daily basis for new articles, and I can start reading new ones the moment I’m on public transport.
Recently, I started looking at Azure Functions. If you’ve never heard of them before, I recommend starting with the official Azure Functions Overview for an introduction, followed by Scott Hanselman’s and Troy Hunt’s recent blog post on potential use cases. After playing around for a short while with them, I thought I’d give them a chance for a mini-project: I’ve been following Packt Publishing’s Free Learning eBook offer for a while now. When I say follow, I actually mean I open my browser, open the page, and check which new eBook is available.

This obviously takes some time, and additionally I forget to do it on a daily basis. While I do not get every free daily eBook, I still want to know if there’s something interested published. So, what I was looking at doing was to implement a small website monitor that checks the offer page once per day and sends me an email with the offer details. Quite simple, should be up and running within a short time.
Preparation
First of all, you obviously need an Azure account. In addition to that, you need a SendGrid account to send out emails. Luckily, Azure subscribers can get a free SendGrid account with up to 25,000 emails each month. More than enough for personal use! Within Azure, click on New, type in SendGrid, and follow the steps to add it:

Once done, create a new API Key in SendGrid and keep it somewhere (as we will need it later).
Furthermore, you also need to add a Function app in Azure if you haven’t already done so. When you create a Function app, you need to specify whether to use a Dynamic App Service Plan or a Classic one. For our small exercise, Dynamic is the best choice (“You don’t have to worry about resource management, and you only pay for the time that your code runs.“). Read more about the differences on How to scale Azure Functions.
Note: You can review the pricing for Functions here (note: Functions are still in Preview, pricing may change). You can also estimate your total cost by using the Azure Pricing calculator. Here’s my estimate for the Function I’m talking about:

Yes, you can safely run your Function for quite a couple of times before getting charged for it.
Once both the Function App and the SendGrid API Key are available, you need to add the key to the Function App’s settings. Open your Function App, go to Function app settings, and select Configure app settings.

Under App settings, add a new setting with AzureWebJobsSendGridApiKey as key and your SendGrid API Key as value.

Once that’s done, save your changes. Your Function apps are now capable of sending out emails via SendGrid.
Creating the Function
In your Function App, create a new Function. Microsoft provides several templates, we’ll use the simplest one and do all the plumbing from scratch (but feel free to check out the available templates to learn how you can integrate for examples Azure Queues or Azure Blob Storage), so select the “Empty – C#” template and give it a name.
Once created, each Function offers you 4 pages where you can manage it – Develop, Integrate, Manage, and Monitor.

Let’s start with setting up the basic “structure” of our Function on the Integrate page. Initially, as we’ve chosen the Empty template, there are no Triggers, Inputs, or Outputs defined. What we want to set up is a Timer trigger (to run our code on a daily basis) and a SendGrid Output (to inform us about the latest offer):

First, add a new Trigger and select the Timer trigger template. Set the Schedule to 0 0 0 * * *. which means that the Function runs every day at midnight (once you add a Timer trigger, the page will also provide some documentation on the format for this in case you want to define your own schedules). Remember to click Save.

Next, add a SendGrid Output. You have the possibility to configure a couple of required parameters either on the configuration page or in your code. Leave the Message parameter name as it is (this is the variable we’ll use in our code), and define the other values as required. As I’m sending the email to myself, I added my email address to both the To and From fields. The Subject and Body will get defined in the code.

Save again, and click on Develop. At the top of the page you’ll see the Code section where you can define the underlying code of your Function.

Copy the following code sample and replace any existing code in your Function:
#r "SendGridMail"

using System;
using SendGrid;

 static string packtUrl = "https://www.packtpub.com/packt/offers/free-learning/";

 public static void Run(TimerInfo myTimer,  out SendGridMessage message, TraceWriter log)
 {
     message = null;
     try
     {
        using (var httpClient = new HttpClient())
         {
             string pageContent = httpClient.GetStringAsync(packtUrl).Result;
             //the content we're looking for comes after a div tag with the class dotd-title
             int tmpIndex = pageContent.IndexOf("dotd-title");
             string offerDetails = pageContent.Substring(tmpIndex +15, 3000);
             //we've now got more content than required, removing anything that is not part of the article description
             offerDetails = offerDetails.Substring(1, offerDetails.IndexOf("dotd-main-book-form")-20);
             offerDetails += String.Format("<br/><br/><a href='{0}'>PacktPub Free Learning</a>",packtUrl);
             //parsing the book title here
             string bookTitle = offerDetails.Substring(offerDetails.IndexOf("<h2>")+4,
                                 offerDetails.IndexOf("</h2>")-9).Trim();

             message = new SendGridMessage()
             {
                 Subject = String.Format("Packt's Free Learning Offer: {0}",bookTitle),
                 Html = offerDetails
             };

             log.Info("Finished successfully");
         }
     }
     catch (Exception exc)
     {
         log.Info("Exception:" + exc.Message + exc.StackTrace);
     }
 }
Note the following:
- The first line (starting with #r) is used to add a reference to an external assembly (documentation)
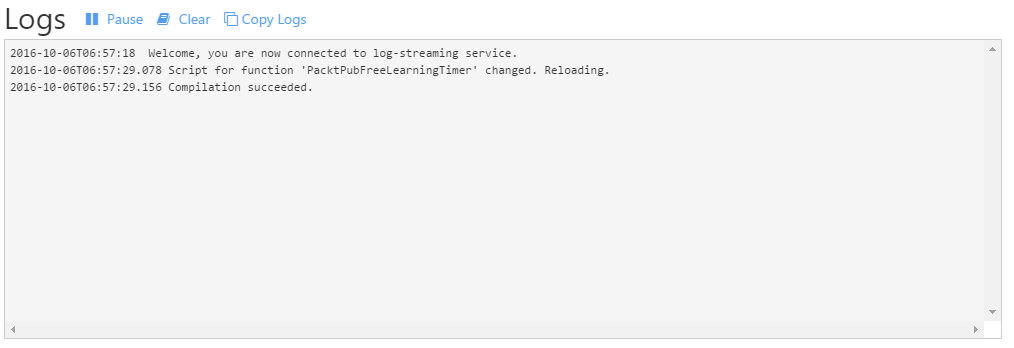
- public static void Run is the main function which gets called when your Function runs. As you can see, we have 3 arguments for it here. TimerInfo myTimer needs to be added as we’re using a Timer trigger. out SendGridMessage message is the SendGrid email output which we defined in the Integration configuration. We need to instantiate it and set any required properties if we want to send an email. Lastly, TraceWriter log provides a mechanism to log any information that you want during your code execution – errors, warnings, general stuff. Anything written to this log gets displayed in the Log section just below your Code section.
- As for the code fetching and extracting the information I want to receive via email, this is pretty straightforward. The few lines I have here instantiate a new HttpClient object, read the offer page content, and fetch the title and description (not in the nicest of ways, but hey, it’s working!).
- Lastly, we’re creating our SendGrid email message and assign it the appropriate subject and email body.

Here’s the final result once the code was executed (either when and the email was sent:

That’s it! A couple of minutes of configuration and coding, and I now receive daily email alerts about the latest free eBook.
Using Azure Functions to receive daily Website Updates via Email https://t.co/7QYJ6jUwpG #azurefunctions #azure
Using Azure Functions to receive daily Website Updates via Email https://t.co/6uULc1LQ19
RT @modery: Using Azure Functions to receive daily Website Updates via Email https://t.co/7QYJ6jUwpG #azurefunctions #azure
Using #AzureFunctions to receive daily Website Updates via Email by @modery https://t.co/YzPT5ZNNZ4 \ I was just about to write this! 😉
RT @jthake: Using #AzureFunctions to receive daily Website Updates via Email by @modery https://t.co/YzPT5ZNNZ4 \ I was just about to writ…
Using Azure Functions to receive daily Website Updates via Email: Note: In this blog post, I’m talking about … https://t.co/Nx7f6aChYQ
RT @modery: Using Azure Functions to receive daily Website Updates via Email https://t.co/7QYJ6jUwpG #azurefunctions #azure
RT @modery: Using Azure Functions to receive daily Website Updates via Email https://t.co/7QYJ6jUwpG #azurefunctions #azure
Very interesting example. However, I wasn’t able to recreate it succesfully. I must have missed something but I get an error in the develop editor:
Cannot bind parameter ‘message’ to type SendGridMessage&. Make sure the parameter Type is supported by the binding.
I’ve checked the imports and parameter names and such, but to no avail. Somebody have a solution?
Ah, I figured it out. Not specifying an API key setting will lead to this error. Very obvious 🙂
Thanks again for a great sample!
RT @SaschaDittmann: Using #Azure Functions to receive daily Website Updates via Email https://t.co/OLmaewOrJJ via @modery
Using Azure Functions to receive daily Website Updates via Email https://t.co/vppLXSRj77 #Azure
Using Azure Functions to receive daily Website Updates via Email https://t.co/6uULc1LQ19
Cool!
https://t.co/QE9Hw0cF9y
After placing the code, something missing I can’t create properly.
Blog Archive: Using Azure Functions to receive daily Website Updates via Email https://t.co/7QYJ6jUwpG #azurefunctions #azure
Using Azure Functions to receive daily Website Updates via Email | Office 365 MVP Rene Modery https://t.co/ZtSzY4Nt3G
RT @modery: Blog Archive: Using Azure Functions to receive daily Website Updates via Email https://t.co/7QYJ6jUwpG #azurefunctions #azure
RT @modery: Blog Archive: Using Azure Functions to receive daily Website Updates via Email https://t.co/7QYJ6jUwpG #azurefunctions #azure
RT @modery: Blog Archive: Using Azure Functions to receive daily Website Updates via Email https://t.co/7QYJ6jUwpG #azurefunctions #azure
RT @modery: Blog Archive: Using Azure Functions to receive daily Website Updates via Email https://t.co/7QYJ6jUwpG #azurefunctions #azure
RT @modery: Blog Archive: Using Azure Functions to receive daily Website Updates via Email https://t.co/7QYJ6jUwpG #azurefunctions #azure
RT @modery: Blog Archive: Using Azure Functions to receive daily Website Updates via Email https://t.co/7QYJ6jUwpG #azurefunctions #azure
Using Azure Functions to receive daily Website Updates via Email –… https://t.co/AhV1DQwvTU #azurefunctions #azure https://t.co/XJpalyG5Sp
RT @SharePointSwiss: Using Azure Functions to receive daily Website Updates via Email –… https://t.co/AhV1DQwvTU #azurefunctions #azure h…
RT @SharePointSwiss: Using Azure Functions to receive daily Website Updates via Email –… https://t.co/AhV1DQwvTU #azurefunctions #azure h…
RT @modery: Blog Archive: Using Azure Functions to receive daily Website Updates via Email https://t.co/7QYJ6jUwpG #azurefunctions #azure
RT @modery: Blog Archive: Using Azure Functions to receive daily Website Updates via Email https://t.co/7QYJ6jUwpG #azurefunctions #azure
RT @modery: Blog Archive: Using Azure Functions to receive daily Website Updates via Email https://t.co/7QYJ6jUwpG #azurefunctions #azure